 StarSiftaccount
This tour takes one night's frames to a finished picture with New picture: you choose the folders, StarSift sorts and checks the frames, and a workflow stacks and cleans them up before the editor opens. The example is NGC 6729 in Corona Australis, 113 frames of 180 s from an ATR2600C color camera on an Askar FMA180 Pro, over two nights. Your own frames, counts and times will differ.
Every screen named here has a page in the manual with more detail.
1. Choose the folders
Click New picture at the top of the left sidebar.
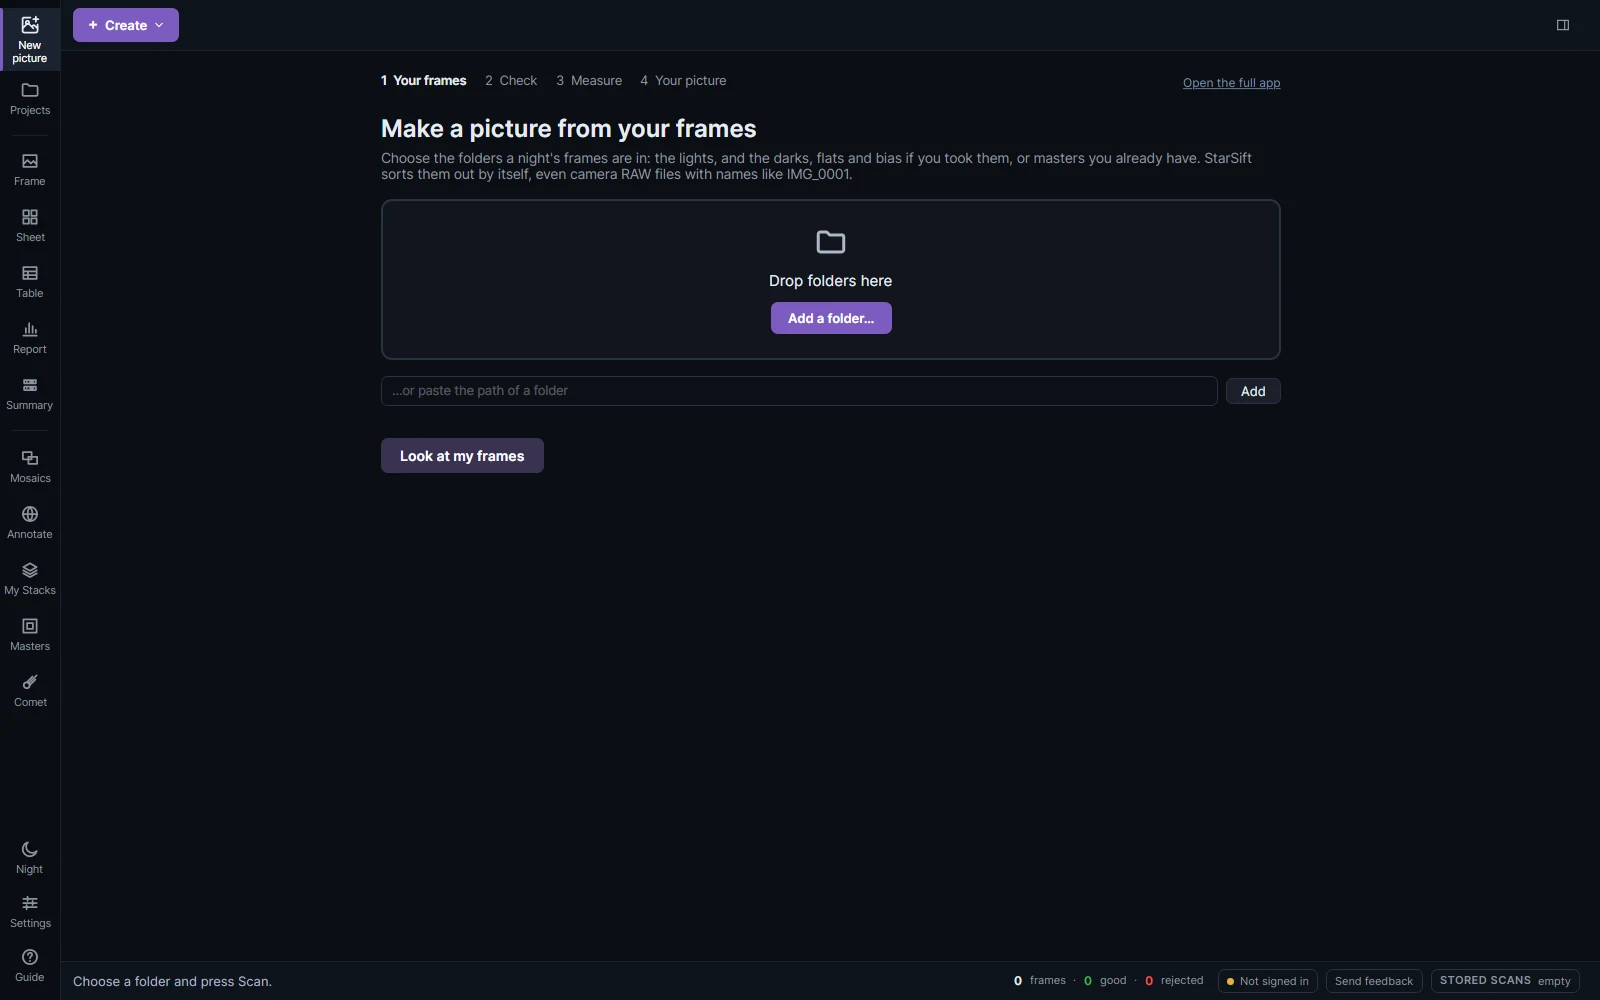
Add the folders the night's frames are in: drop them on the page, click Add a folder…, or paste a path into the box and click Add. Add the lights and, if you have them, the calibration frames: darks, flats, dark flats and bias, either as single frames or as masters made earlier. Everything can be in one folder or spread over several; StarSift reads each file and sorts it by its header, and by its pixels when the header does not say (camera RAW files called IMG_0001 included).
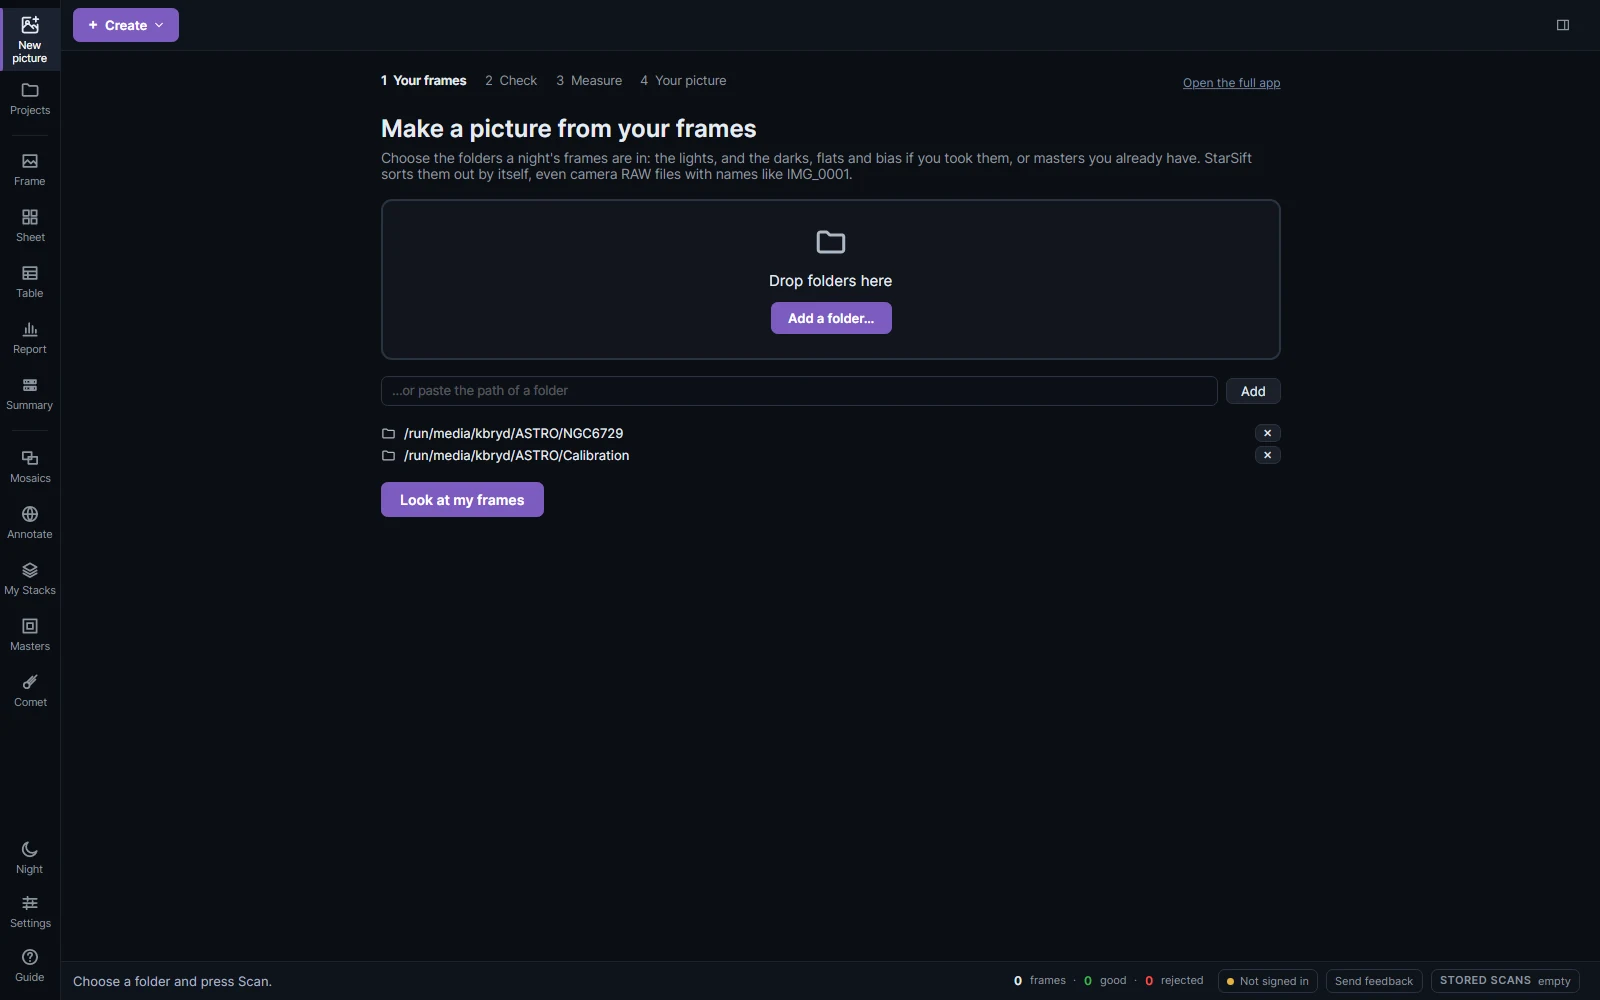
Click Look at my frames.
2. Check what was found
StarSift names the target and shows what it found: the light frames and their total exposure, and the masters. Under What we will make is the kind of picture these frames lead to: a color picture here, LRGB for a mono camera with L, R, G and B filters, HOO for a dual-band filter, and so on.
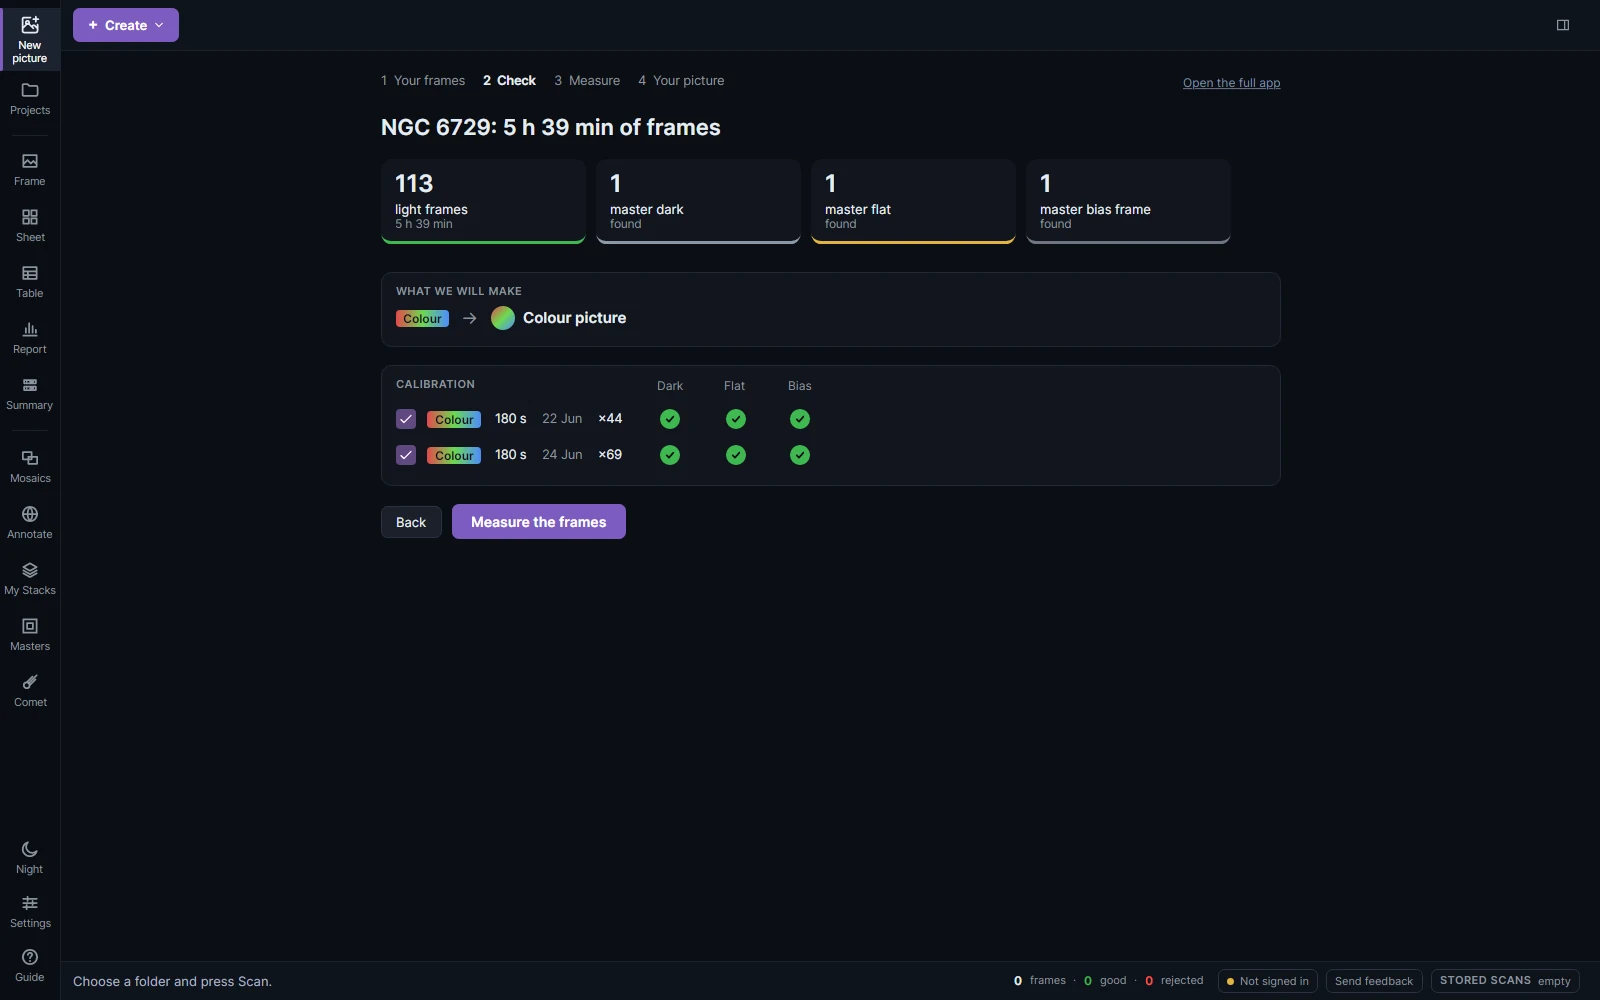
The Calibration grid has a row for each set of lights (one per filter, exposure and night) and a mark for its dark, flat and bias. A green tick means a master fits; hover a mark to read why it fits or what is wrong. A problem is explained below the grid with how to mend it, such as a flat whose filter is not named. Untick a row to leave that set out of the picture.
If a set has no master, you can add one here, as master files or as single frames that StarSift makes into a master. Click Measure the frames when the grid looks right.
3. Measure the frames
StarSift measures every light: its stars, focus, trailing, cloud and sky brightness. Frames it read while sorting are measured already, so this is often quick. A frame is rejected when it falls short of the rest of its night by more than the Balanced screening allows (see Frames and screening).
Skip measuring next to Stop reads only the headers instead. Every frame then goes into the stack unchecked; the stack's outlier rejection still takes out satellite trails and hot pixels.
4. See the night, then make the picture
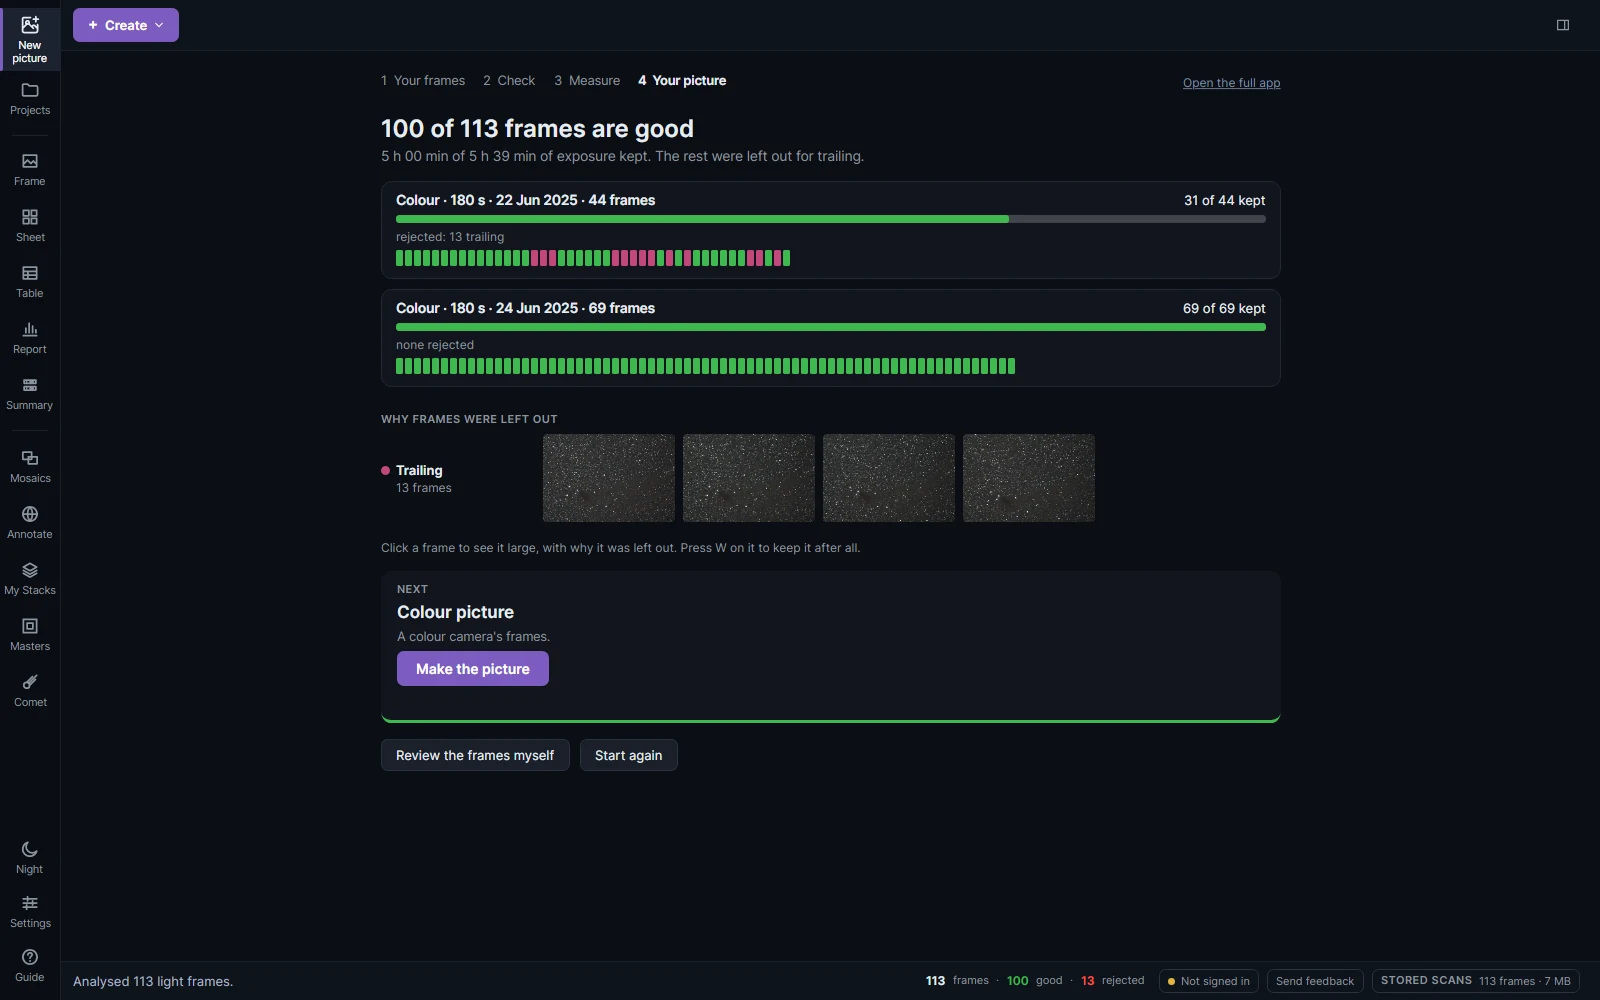
Each night has a bar of its frames in time order: green good, colored by why a frame was left out otherwise. Here the first night lost 13 frames to trailing. Why frames were left out shows a few of each kind; click one to see it large with its reasons, and press W on it to keep it after all.
Click Make the picture. The workflow window opens and runs the workflow that suits the frames, with the masters chosen in step 2.
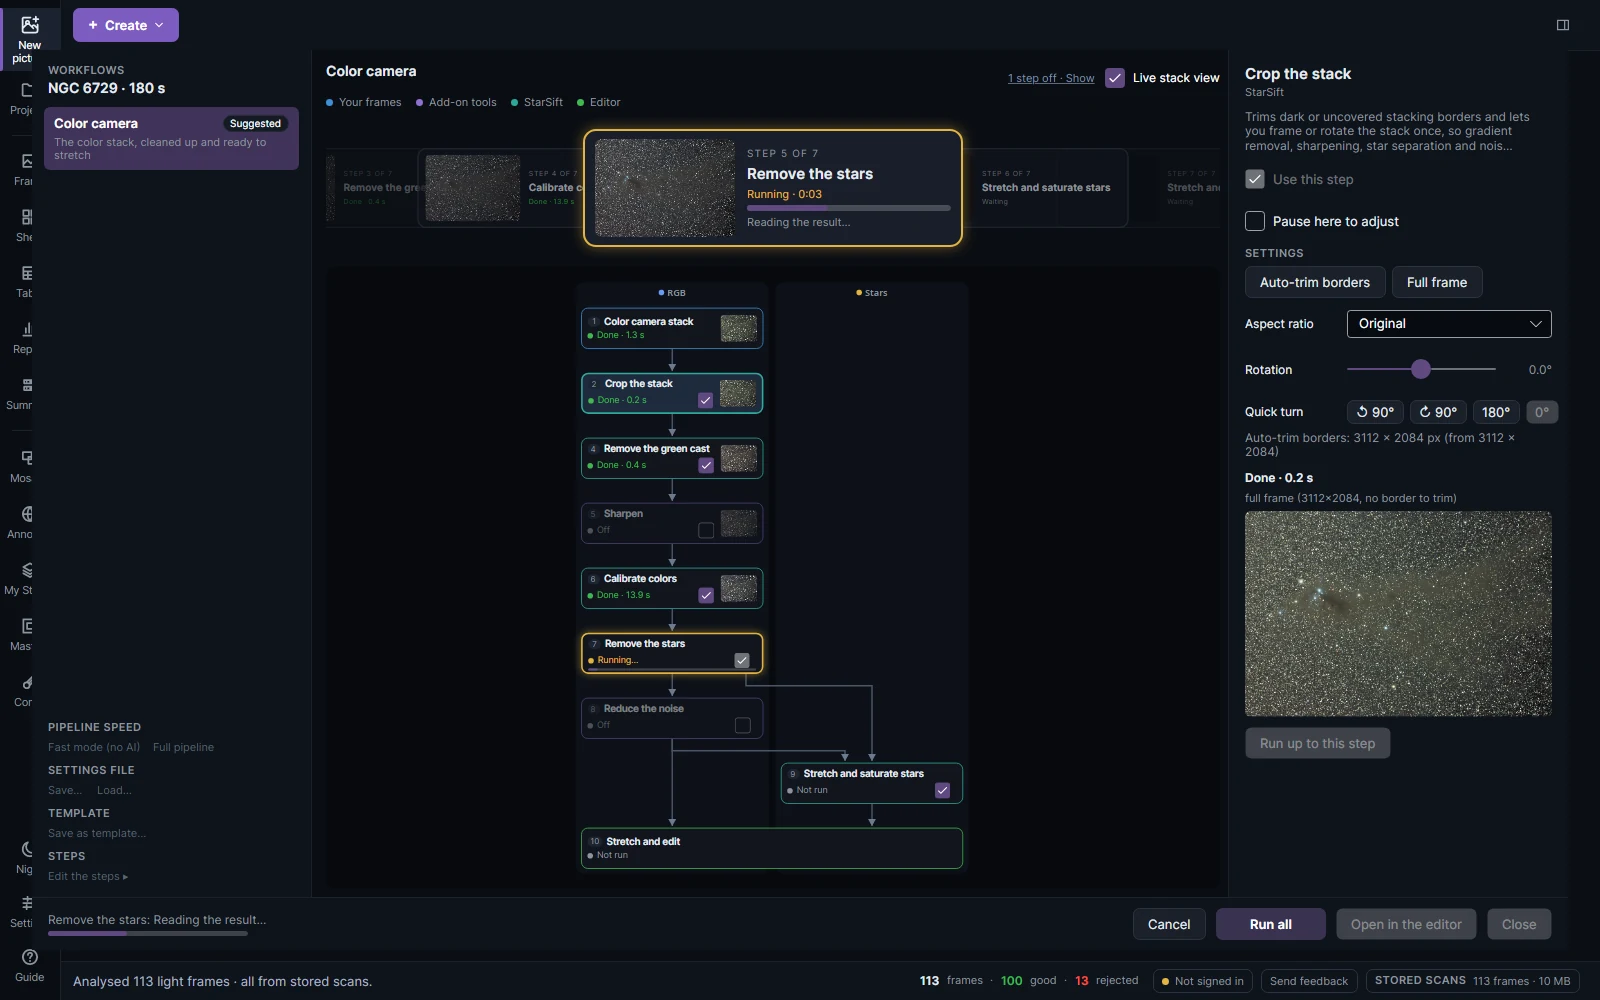
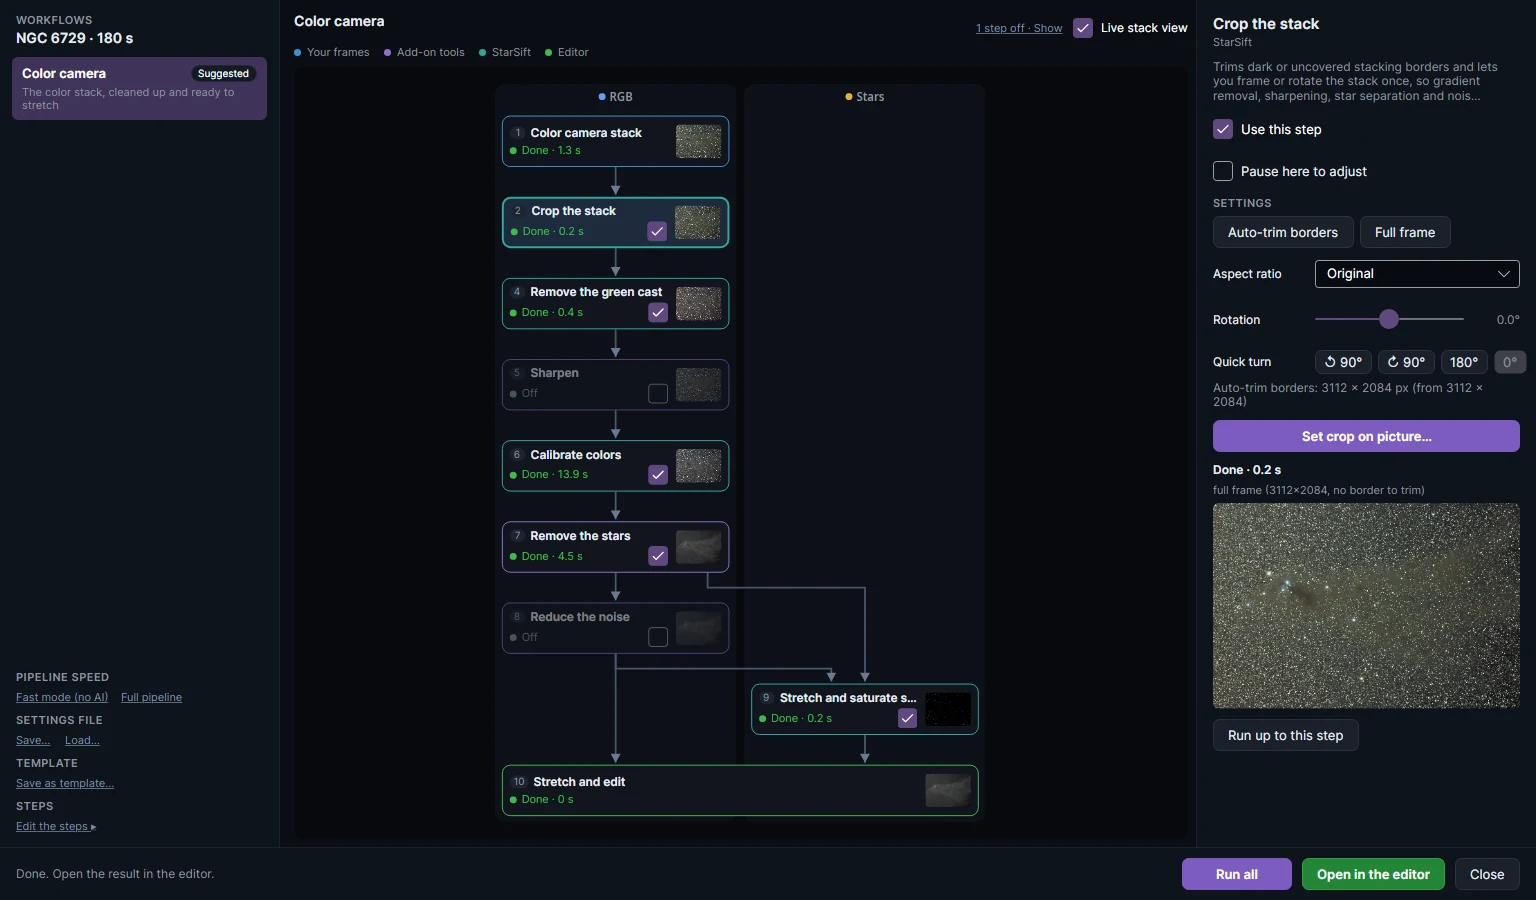
The color camera's workflow stacks the frames, trims the stacking borders, removes the green cast, calibrates the colors against Gaia star spectra and takes the stars out into a layer of their own. Sharpening and noise reduction are there too, off by default; switch them on in the diagram if RC-Astro's tools or StarSift's own are what you want. The Workflows page explains every step.
5. Finish the picture in the editor
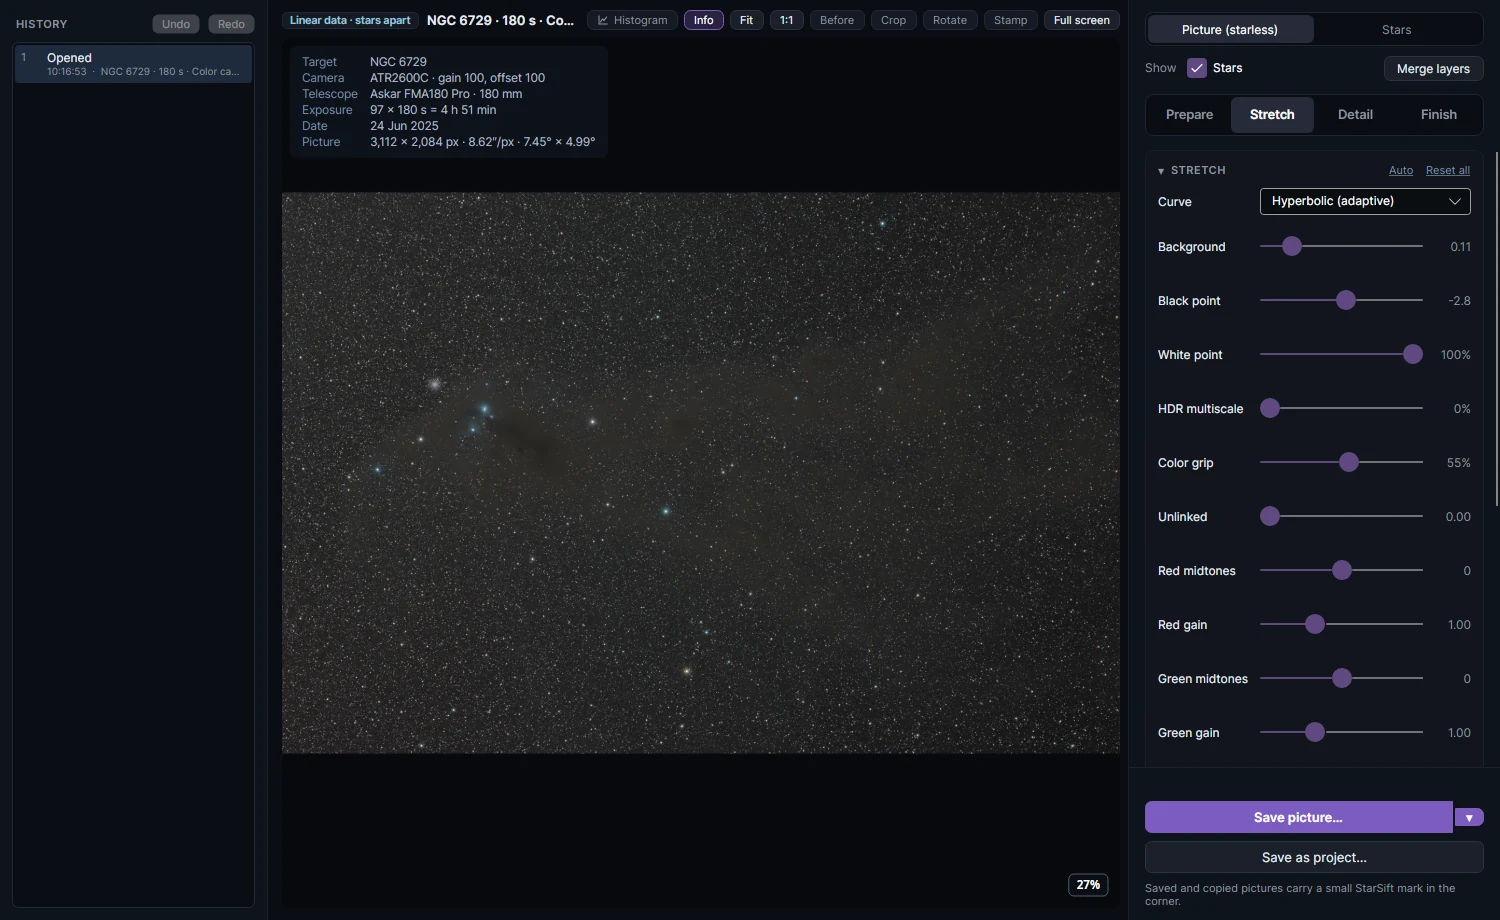
Click Open in the editor. The picture opens stretched and looking close to finished, although its data is still linear: the editor draws the stretch over it, and every slider can be moved back and forth without losing anything. How the stretch is chosen explains where the starting point comes from.
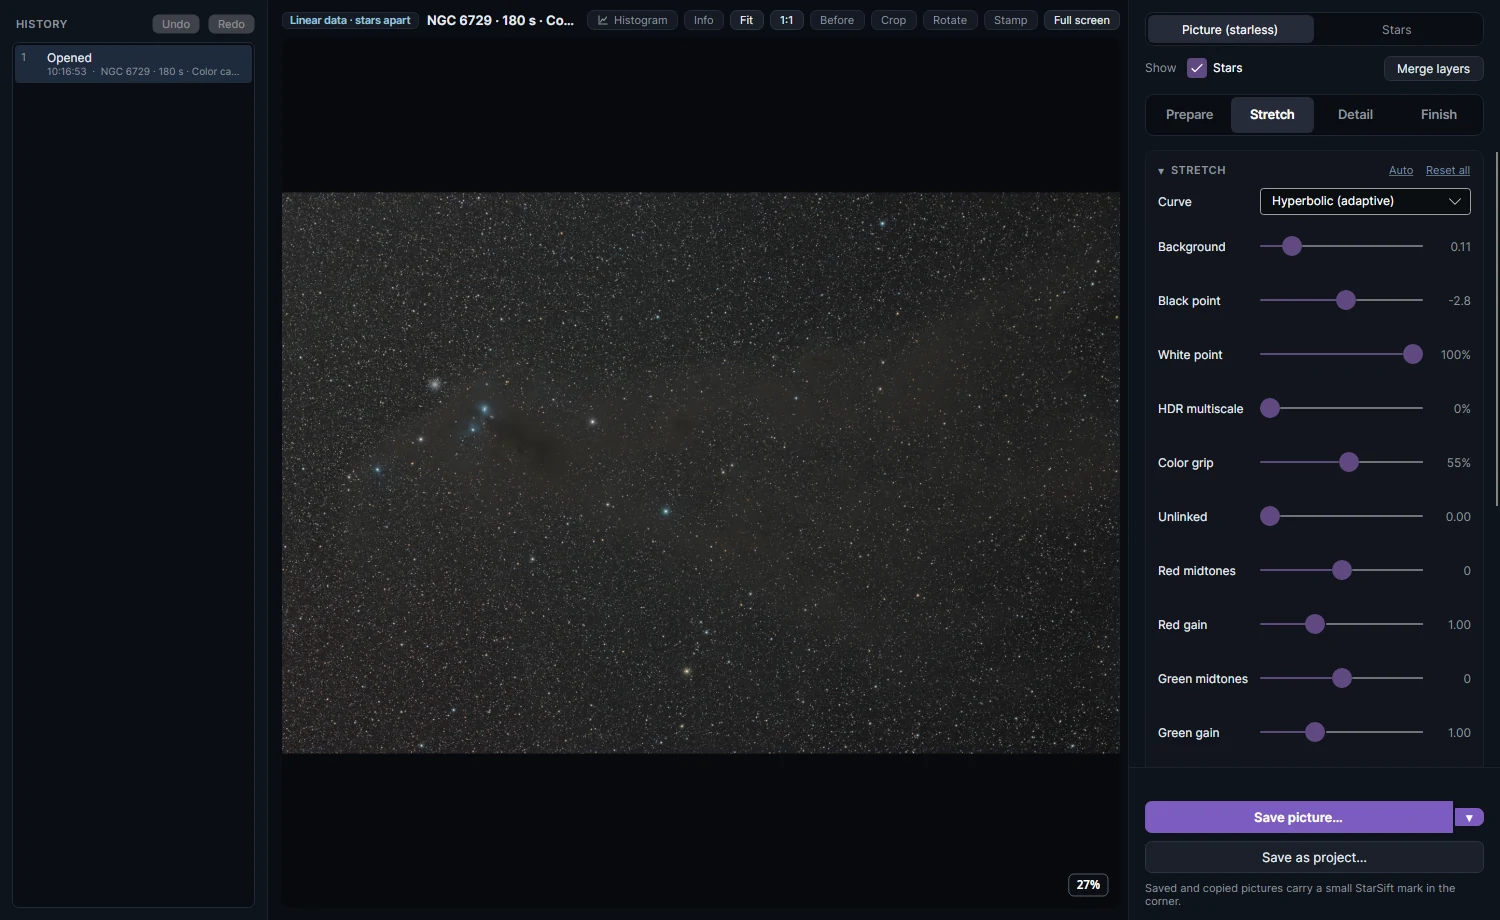
The tools on the right work on one layer at a time: Picture (starless) or Stars, chosen at the top. They are in four tabs, used roughly in order:
| Tab | What it is for |
|---|---|
| Prepare | On the linear data: remove the sky's gradient, blend in an HDR stack, calibrate the colors. |
| Stretch | How bright the sky and the stars are, curves, contrast, color and local adjustments. |
| Detail | Star separation, sharpening and noise reduction. |
| Finish | A title and frame, your logo, and the names of the objects in the picture. |
A good first pass: raise Strength on the Stretch tab if the faint dust should show more, open Contrast to bring up Shadows and faint nebula, and use Saturation under Color. Switch to the Stars layer to make the stars smaller with Star tightness or dimmer with Star brightness. Each change is a line in History on the left; click a line to go back to it.
Press I to show the camera, exposures and filters over the picture's corner; press it again for all of it, and once more to hide it.
6. Keep it
Save picture… writes a JPEG, JPEG XL or 16-bit TIFF at full size (Ctrl+S); its arrow also copies the picture or saves the linear layers for another program. Save as project… keeps the layers, the stacks and every setting, so you can open the picture again from Projects and carry on where you left off.
That is the whole path. From here:
- Frames and screening to look through the frames yourself and decide which to keep.
- Stacking to stack a night, a filter or a target from the frame list, with your own choice of masters and options.
- The editor for everything the four tabs can do.