 StarSiftaccount
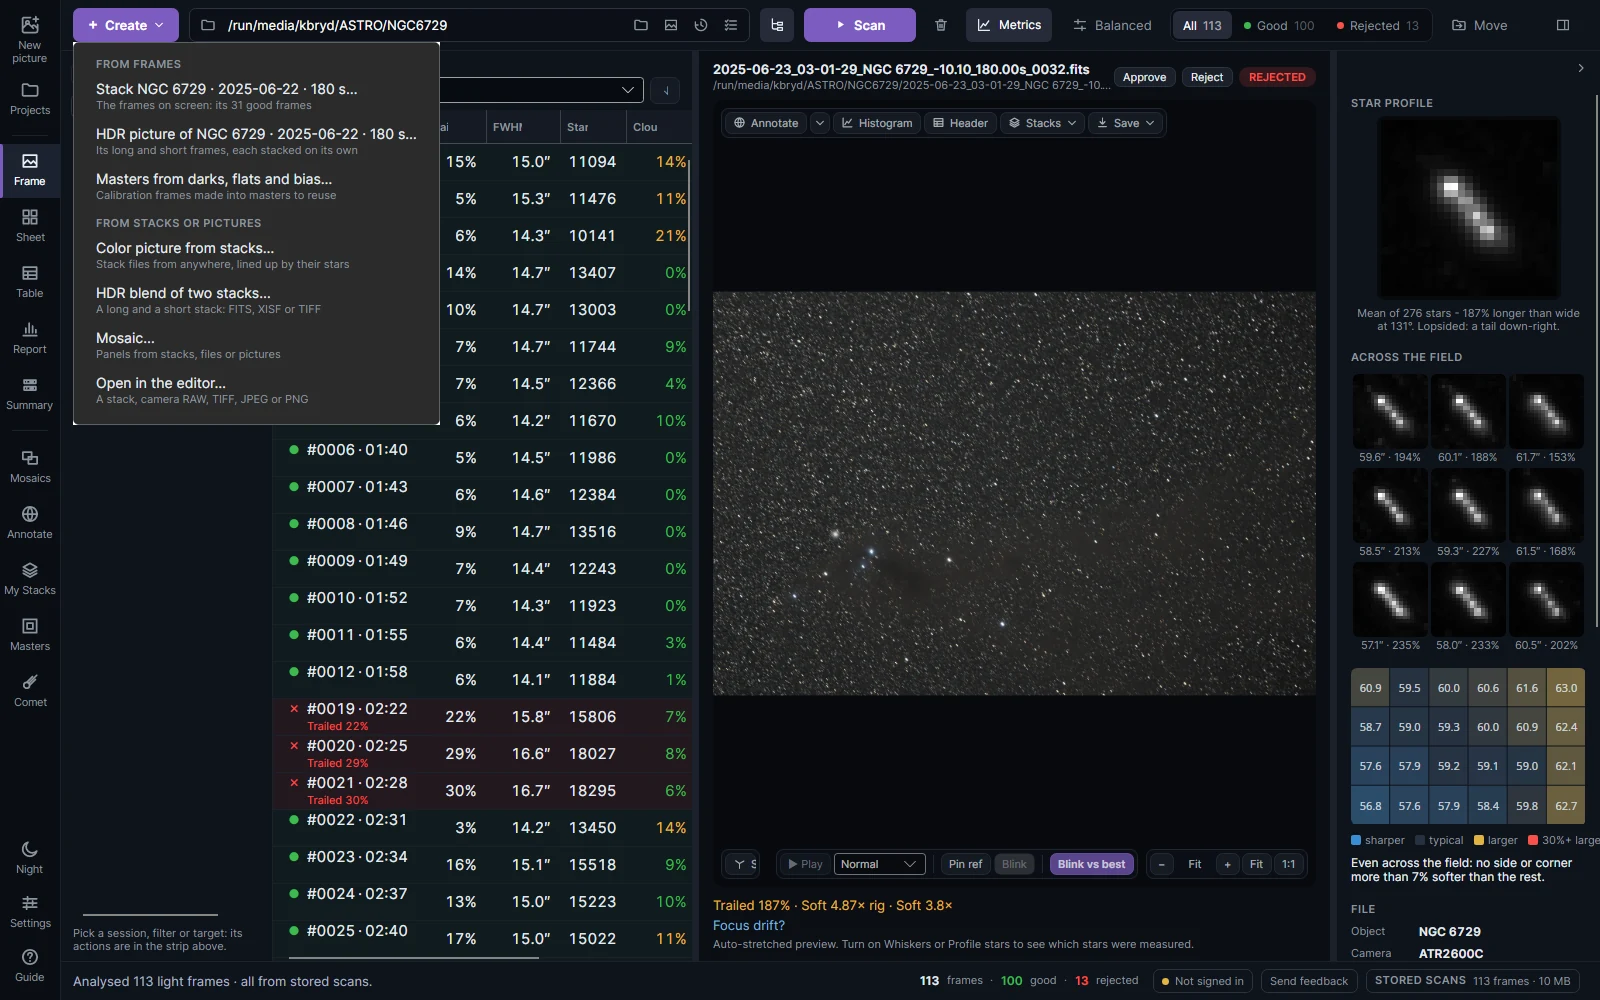
+ Create at the top left makes something new. What it offers depends on what is on screen.
From frames
| Item | What it makes |
|---|---|
| Stack ‹the night on screen›… | The stack dialog on the frames you are looking at. With nothing loaded, it is New picture from a folder… and opens New picture. |
| HDR picture of ‹the night›… | An HDR picture of the frames on screen: each exposure length stacked on its own (see below). With nothing loaded, it asks for a folder with two or more exposure lengths. |
| Masters from darks, flats and bias… | Masters made from raw calibration frames, offered afterwards for the lights they fit. See Calibration masters. |
From stacks or pictures
| Item | What it makes |
|---|---|
| Picture from stacks… | Stacks of each filter (or a color camera's) run through a workflow without stacking: LRGB, LRGB with Ha, SHO, HOO, narrowband with RGB stars… then finished in the editor. |
| Combine images… | Stacks, pictures or projects into one image: an LRGB, RGB, HOO or SHO picture, your own mix or Channel Expressions, or stacks of one filter merged (a fragment into a whole frame, a long and a short exposure). |
| Mosaic… | The Mosaic Stitcher, with stack files, pictures or targets as panels. |
| Open in the editor… | A stack, a linear picture from elsewhere, a camera RAW frame (CR2, CR3, NEF, DNG), or a finished JPEG or PNG for the last touches. |
Picture from stacks
Picture from stacks starts a workflow from stacks you already have, made here or in APP, PixInsight or Siril (FITS, XISF or TIFF). Add stacks… takes stack files or all the stacks of a saved project; files can also be dropped on the window. Each stack's filter is read from its header or its name and can be changed in its row: Luminance, Red, Green, Blue, Ha, OIII, SII, a color camera's stack, or a color camera's stack through an Ha + OIII or SII + OIII dual-band filter. The window lists the workflows the filters allow, the recommended one first; Choose a workflow… opens them in the workflow window, where they run as a target's workflows do but start from the stacks: the color picture is combined from the files (lined up by their stars), and the workflow's own steps line up the luminance and the narrowband stacks, crop, take out the gradient, sharpen, separate the stars and blend the lines. Stacks of another size or framing, turned, or upside down (as another program may write them) are lined up all the same; a stack that covers only part of the field (a luminance of a smaller field) is used where it reaches, the picture kept whole and eased into the stack over its edge. Open in the editor finishes the picture. Comet stacks go to the color picture from stacks instead, which lines them up by their stars' stacks.
Combine images
Combine images takes stack files from anywhere on the disk (FITS, XISF or TIFF, made here or in APP, PixInsight or Siril), the stacks in My Stacks, temporary ones too, saved projects (their picture, one of their stacks, or all of them), and pictures open in the editor. Add image → From My Stacks… lists the stacks, searchable by target, filter, night or file name; tick the ones to add (for HOO, a target's Ha and OIII), and they are lined up and added together. Add image → From file… takes one file, shown on the canvas to accept, or several picked together, which are lined up and added at once (a file that cannot be lined up is named and left out). The first image sets the canvas; every other one is lined up on it by its stars, even when it covers only part of it, is turned, or is flipped top to bottom. Each image's filter is read from its header and can be changed in its list. Then choose how to combine them:
| Option | What it makes |
|---|---|
| Palette | The colour picture the filters make, as the app makes a stack's (see the presets below). Each channel's sky is taken off, RGB and LRGB are balanced on the stars, narrowband channels are put on one footing by their noise. |
| Sliders | Your own mix: how much of each image goes into red, green and blue, and its strength. The RGB, HOO and SHO buttons set them. |
| Expressions | Channel Expressions over the images' names (Ha, Oiii, Sii, L, Red…): one field per channel or assignments, a colour or a mono result. |
| Merge one filter | Stacks of one filter into one mono image: each is put on the first's scale by what they both show and blended by its noise, so a strong fragment rules inside its footprint, and a long exposure gives way to a short one where it burns out (HDR). Broad light is blended over a wide band and fine detail over a few pixels, so no seam shows. |
The preview zooms as the editor's does: the wheel zooms, dragging moves, double-click switches between the whole image and 1:1, and zoomed in it shows the result at full resolution (it takes a moment while it is composed at full size). ✕ takes an image out, the first one too: the next takes its place on the same canvas. Where an image does not reach, the first image shows in grey, with a soft edge, or the picture is cropped to where all reach. Open result in editor opens the full-resolution linear picture. Combine images… in the editor starts with the picture's own stacks (a mosaic's channels by its palette).
The same is in My Stacks: tick the stacks of one target, one per filter, and combine them. For a target you scanned, its workflow does all this and more, step by step.
Palette presets
The list offers the presets the images' filters make, the fullest first; adding an image that makes a fuller one (Ha to an RGB set) moves to it.
| Preset | Filters | What it makes |
|---|---|---|
| LRGB | L, R, G, B | Luminance for the detail, RGB for the colour. |
| RGB | R, G, B | Red, green and blue as they are. |
| LHaRGB, HaRGB | L, R, G, B (or R, G, B) and Ha | LRGB or RGB with the Ha's emission in the red and a little in the brightness. |
| LOIIIRGB, OIIIRGB | L, R, G, B (or R, G, B) and OIII | LRGB or RGB with the OIII's emission in green and blue. |
| LHaOIIIRGB, HaOIIIRGB | L, R, G, B (or R, G, B), Ha and OIII | Both lines. |
| SHO | SII, Ha, OIII | The Hubble palette: SII red, Ha green, OIII blue. |
| HSO, HOS, OSH | SII, Ha, OIII | The same three in another order: Ha red, SII green, OIII blue; Ha red, OIII green, SII blue; OIII red, SII green, Ha blue. |
| HOO | Ha, OIII | Ha red, OIII green and blue. |
Ha and OIII go into an RGB or LRGB picture as a workflow puts them in: on the pictures without their stars, only the line's emission, with the light the broadband filters already have taken off (measured on the stars), and the colour picture's stars over it. The preview blends on the pictures as they are and, round each star the colour picture shows, fills in what the blend added from round the star (a knot of emission found among the stars is left as it is); Open result in editor does what a workflow's last steps do: the star remover you set up takes the stars out of the colour picture (they become its stars layer) and out of the lines, and the Ha and OIII open as the editor's line layers, to blend and tune there (this takes as long as a workflow's star-removal steps). Ha strength and OIII strength set how much goes in to start from (1 is where the editor's layers start, 0 leaves it out). Faint glow lets in a line's faint glow over the whole field: the Ha round a nebula that stands over the noise only over many pixels, which the pixel-by-pixel blend leaves out (round the Cocoon, a whole field of it). It is taken from the line without its stars, over the field's darkest part, and kept by the editor's layer; at 0 only what stands out pixel by pixel goes in.
HDR pictures
A bright core (the Orion Nebula, a globular cluster, a bright galaxy) burns out in long exposures, and short ones are too shallow for the faint parts. An HDR picture takes both.
- HDR picture from long and short frames stacks each exposure length on its own, and the short stacks fill in where the long ones burn out.
- Combine images → Merge one filter merges a long and a short stack into one linear picture, the short one taking over where the long one burns out.
- HDR blend in the editor (Prepare → HDR blend → Blend another exposure…) lines a shorter stack up with the picture, matches its brightness, and blends it into the linear data where the long one nears saturation, or where you paint it in.
Both work on the linear data before the stretch, so the result is processed like any other stack.